
Guideline to use Finbit App
Finbit is an application used to keep track of financial information of its users. Users can record their income amount, hours worked, expenses, savings, loans, and their happiness level on a daily, weekly or monthly basis. According to the reported amounts, the app provides instant results in different forms of graphs and analysis based on their recording frequency, the users are able to know how much they are spending on what and adjust their unnecessary expenditures to increase their savings for future use.
How to get the app?
Users can download and install the app on their android device from google play store.
How to register?
In order to register for this application, a person needs to insert his/her full name with his/her email address and password of his/her choice. After creating the account, the admin will approve the account and then one can easily login with his/her created account (N.B. no one cannot access this account beside the owner of the account unless the information is shared willingly)
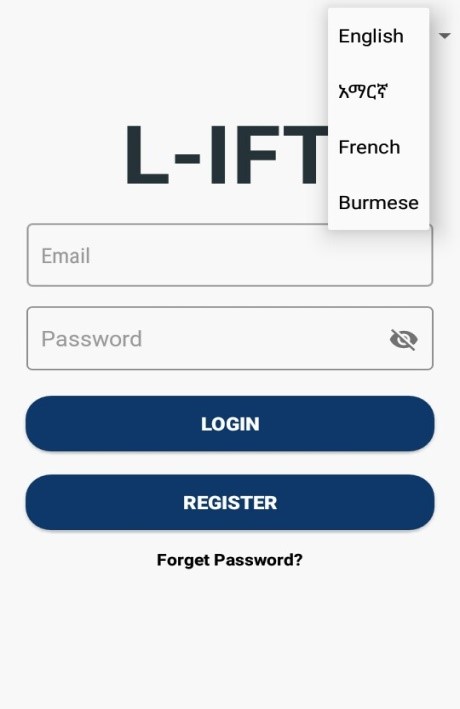
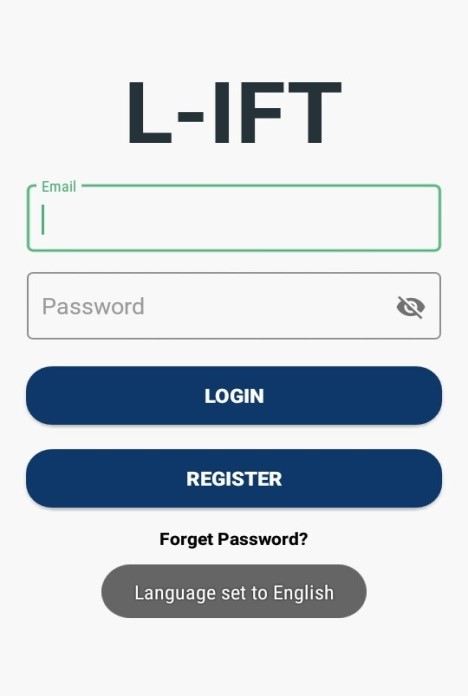
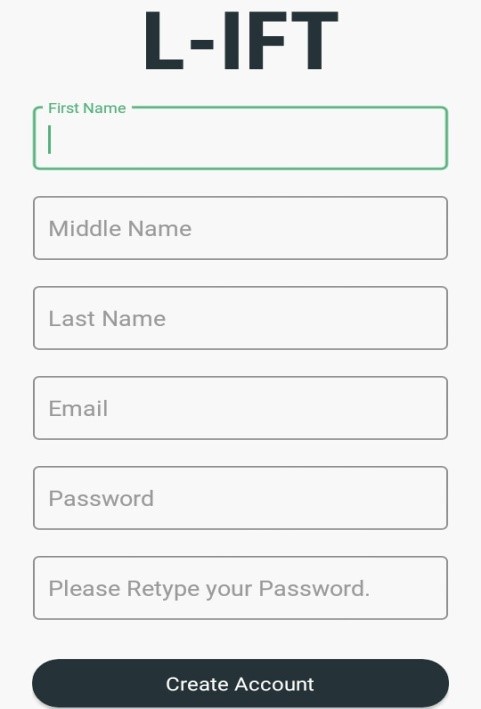
When entering the app, you are required to login (if you are already registered) or register (if you don’t have an account yet). On this part, one can change the language (there are four options available). In order to register, you need to fill out the information viewed on the third picture.
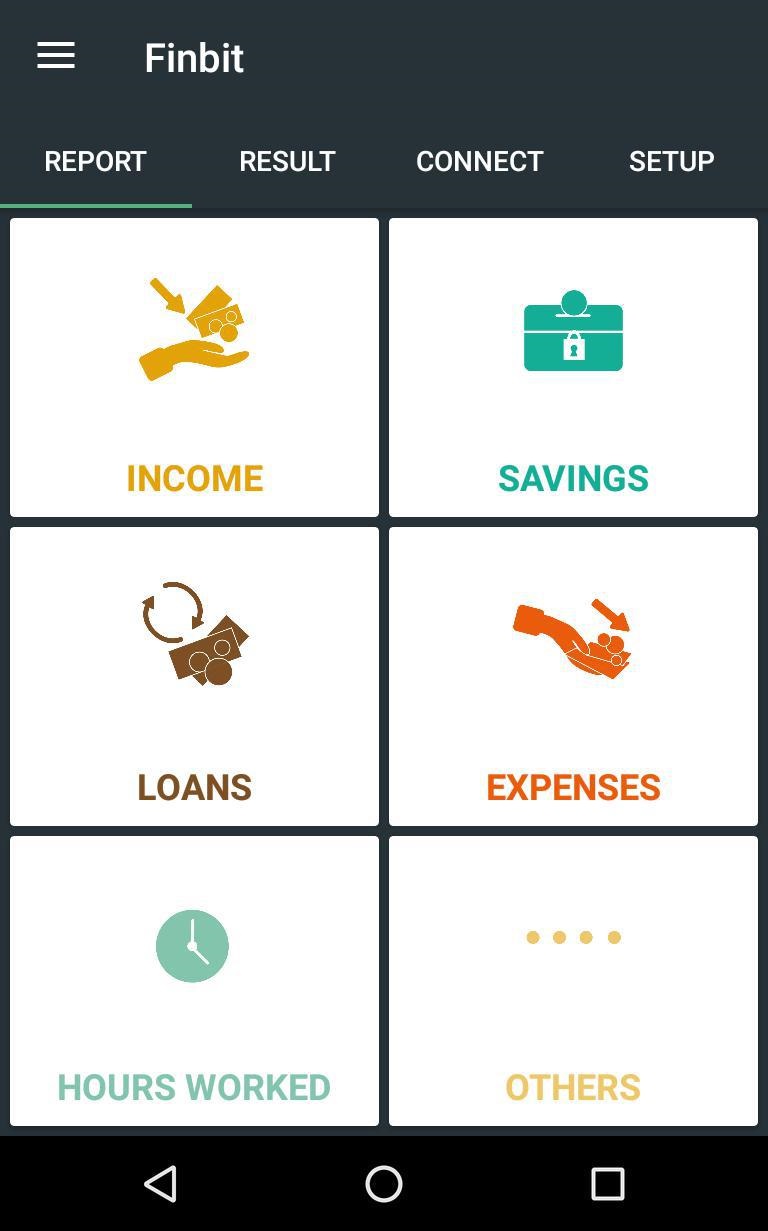
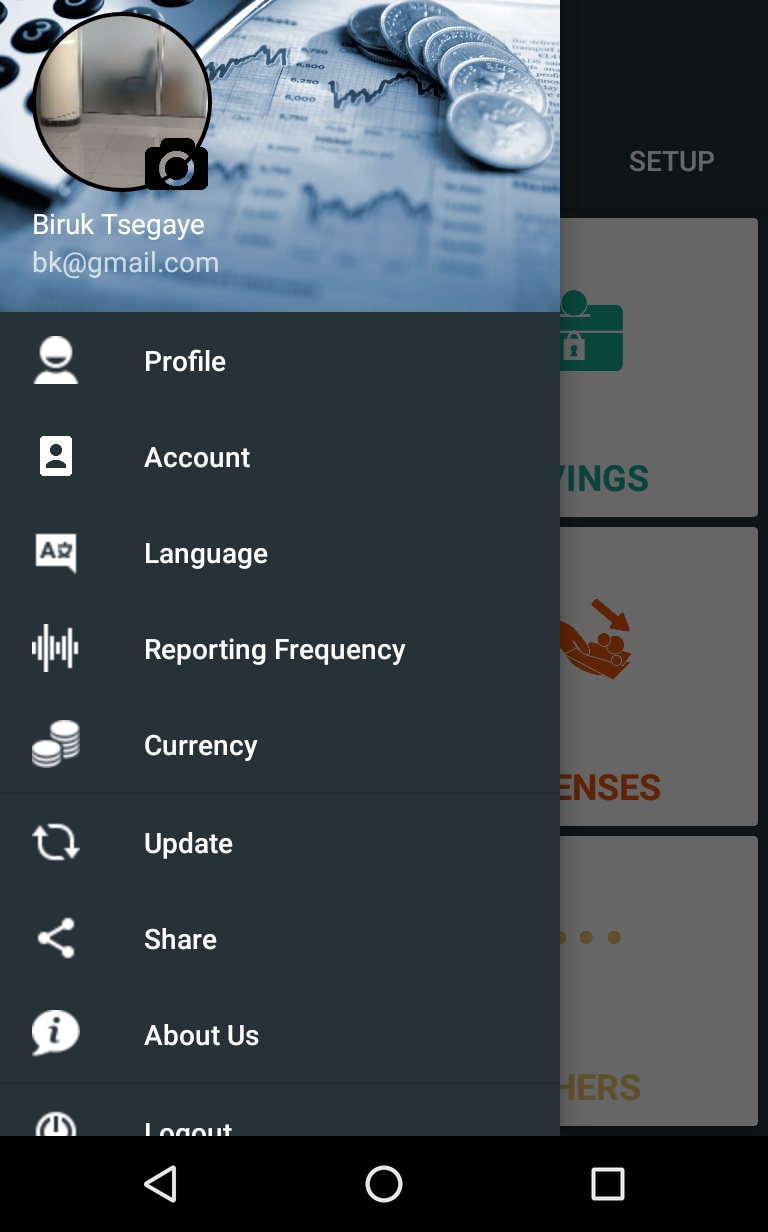
Once the user gets access to enter the app from the admin, he/she will fill out his/her profile and can also edit it once it is done by getting into the profile part shown in the picture. Moreover, the type of currency should also be selected since the amounts of money will be displayed in the currency chosen initially. As can be seen on the fourth picture, there are 6 icons (income, savings, loans, expenses, hours worked, and others) hence; users can report their financial information in their own categories. On top of the icons, you can see ‘report’, ‘result’, ‘connect’, and ‘set up’ and by clicking on each of them you can report, see the result of your report, connect with employers and lender, and setup the income sources, savings, and loans (can be edited or deleted as you please).
How to record on the app?
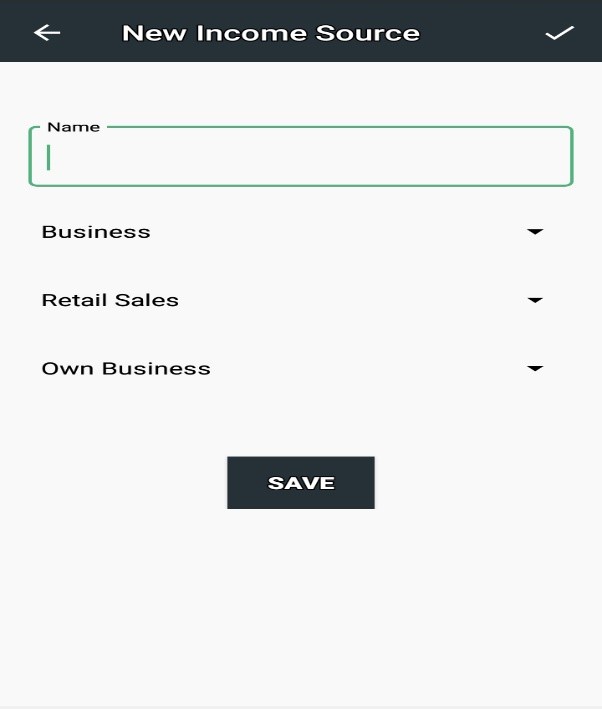
When the user open either income, loans or savings under report for the first time or if he/she doesn’t record any data before, the app automatically navigate to the setup page where the user can register or setup their income sources, loan and savings respectively.
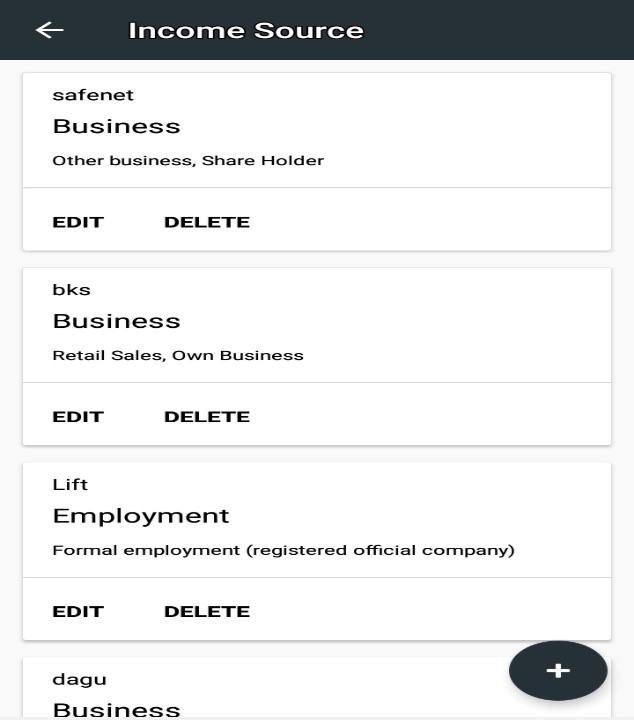
Income: initially it requires the users to insert the income source(s) one by one (if there are one or more sources) and once this information is saved, the user can insert the income amount and also specify from which income source the amount is received along with the hours worked. The income levels will be displayed in the income segment and can be edited if mistake is made while inserting the data.
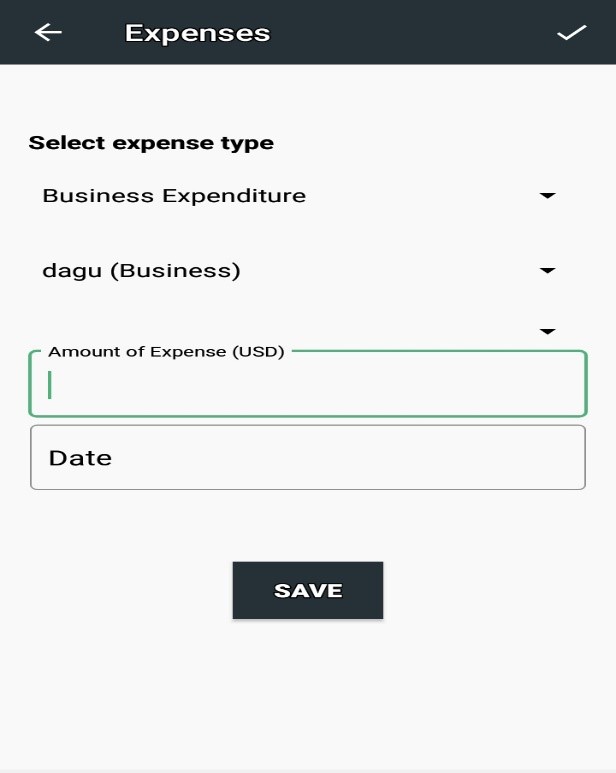
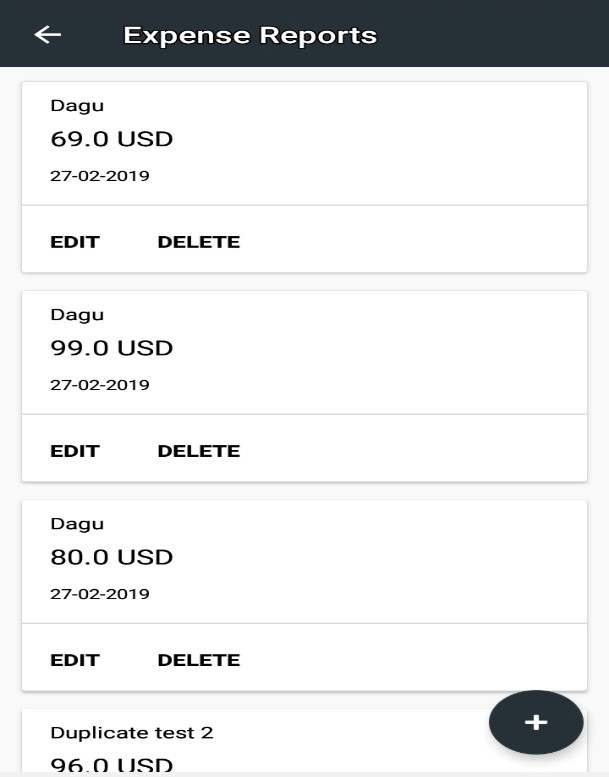
Expenses: there are two types of expenses in this segment namely business expenditure (expenses incurred in doing the business such as purchase of inputs, paying up bills and so forth) and private expenditure (e.g. food at home, toiletries, food outside, etc.). Hence, users can easily insert their expenses by specifying which expense it is (either business or private) and for which purpose the expense was made (if it is private, one needs to select from the different options mentioned above).
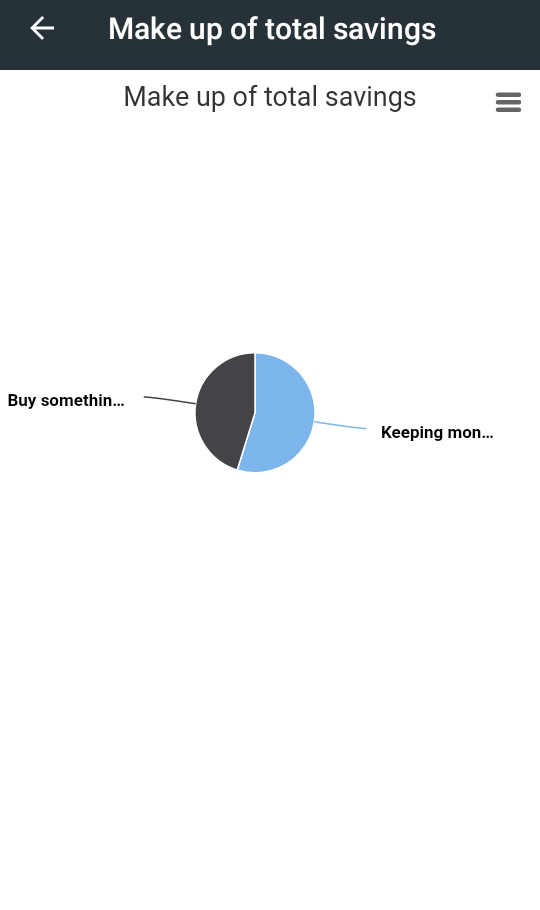
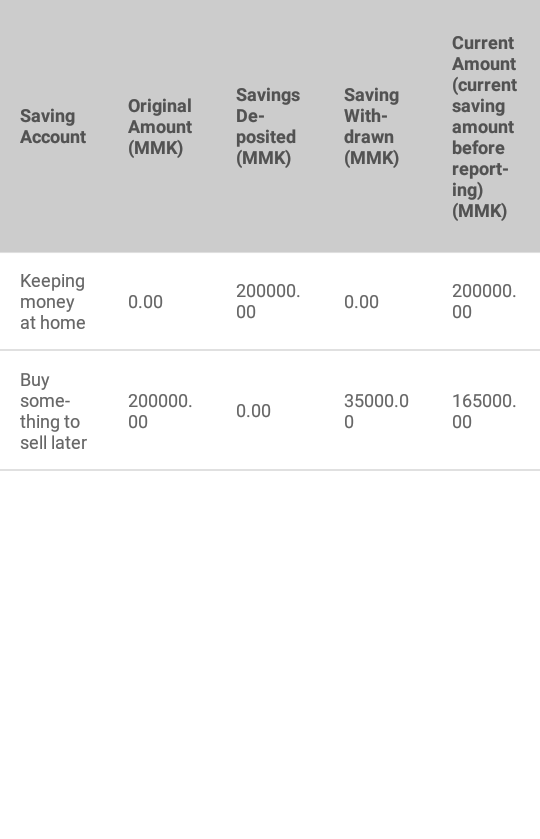
Savings: In this segment, users need to specify in which type of saving methods they are saving their money and also can state their savings goal (if they wish). And if they withdraw from their savings accounts, the amount should be stated as ‘saving withdrawal’. This helps the users to know how much they are saving (either formally or informally) and how much they are withdrawing from their accounts.


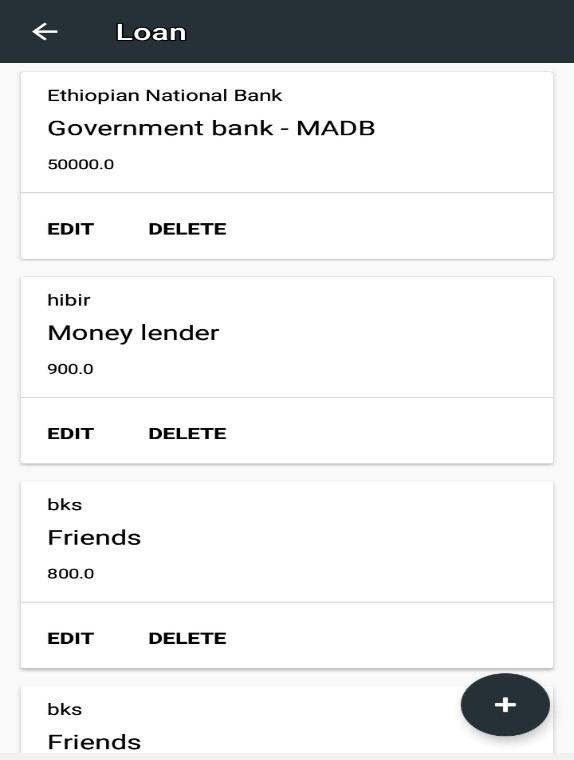
Loans: the users can identify from where they took loan, amount received, and repayment amount on the app. And if they repay the loan amount that should also be included in their report by then they could identify how much they are left with in repaying their loans.

The app also enables to connect employers and lenders!
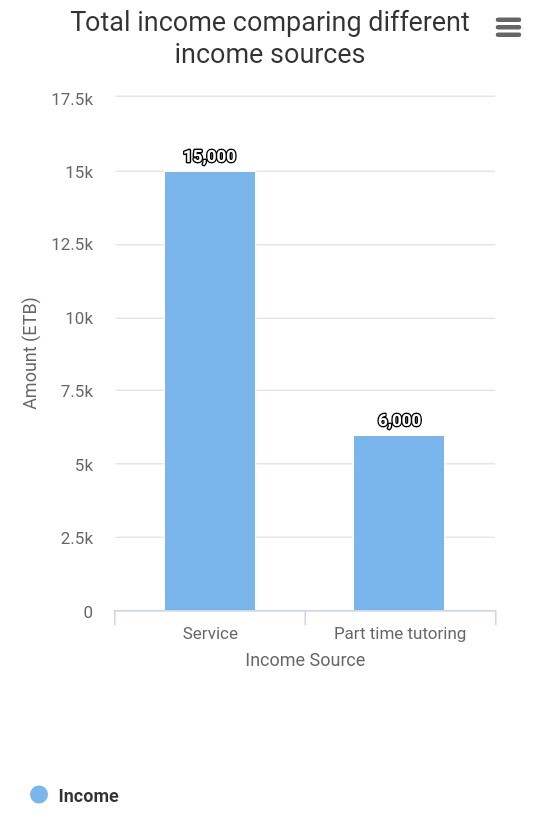
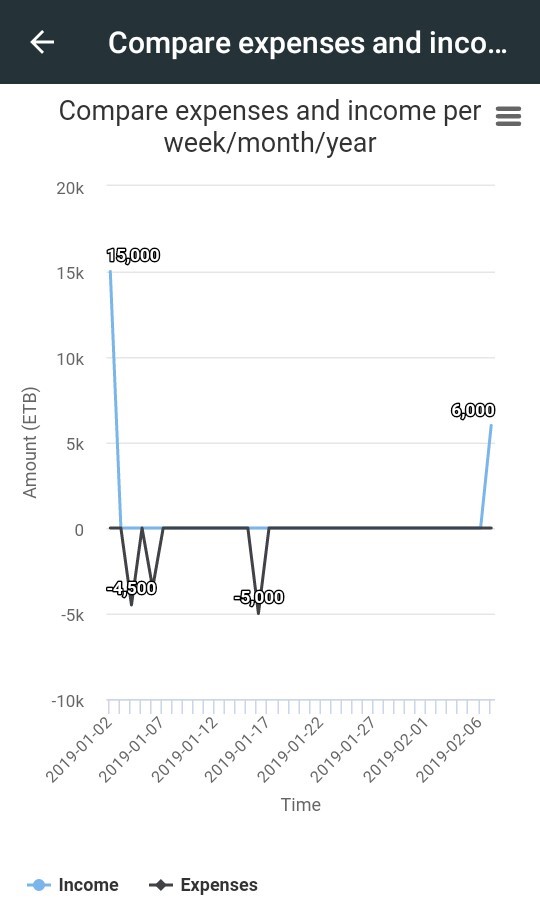
Here are some examples of how the results of your report are presented.

Additional Features:
- This application is multilingual, the user can navigate to the language page and he/she can set the language according to their preferences.
- Users can share the application through sharing applications.
Finbit is an application created in order to track our financial transactions; i.e. track our income, expenditures, hours worked and savings and loans. This helps us to exactly know our current financial status; so as to assess and understand the exact sites of income and outcome. This helps us to regulate our incomes and outcomes, tracking current wastage and increasing efficiency in relation to workload versus income. It helps us to prepare a roadmap for future expenditures and profit. It enables us to prepare a plan for the future with improved income, less expenditure and better workload. It helps us track our loans, so as to perform responsible transactions. It increases transparency and accountability by providing a written, prepared and easily accessible document for reference at any given time.
This application will also create tables and graphs of our transactions (e g: total expense per week/month, comparing savings to income, loans versus loans repaid etc.) and it will also compare our transactions with others, helping us learn better ways of performing similar activities.
Finally, Finbit also allows individuals to apply for a loan through this application by integrating a crowd funded system to the appropriate borrower. So, Finbit can be used by researchers/respondents/borrowers, lenders/crowd funders, financial institutions, etc.